This how-to will teach you different ways to take a full screenshot of the desired screen or a partial screen on your Windows 10 PC. The easiest and most complete way to capture any part of your screen is to use Snip & Sketch, Microsoft's new built-in capture tool. As long as you updated Windows 10 after February 2019, you will find this tool by searching for it in the Windows search bar. So, update your Windows in the first step.
Using Snip & Sketch
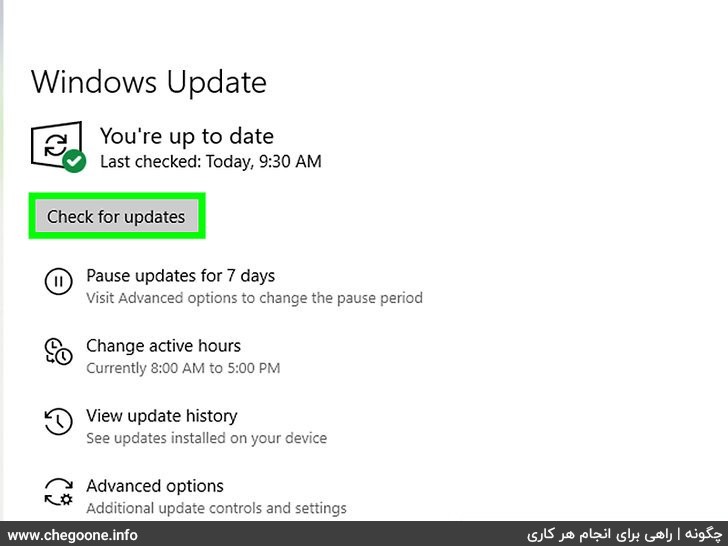
1. Set your screen to the image you want to screenshot.
Even if you just want to capture a part of the screen, you can easily do it using Snip & Sketch.
Snip & Sketch is an updated version of the original Snipping tool for Windows 10. As long as you have updated your computer to at least version 1809 (February 2019), you will have this tool on your computer.
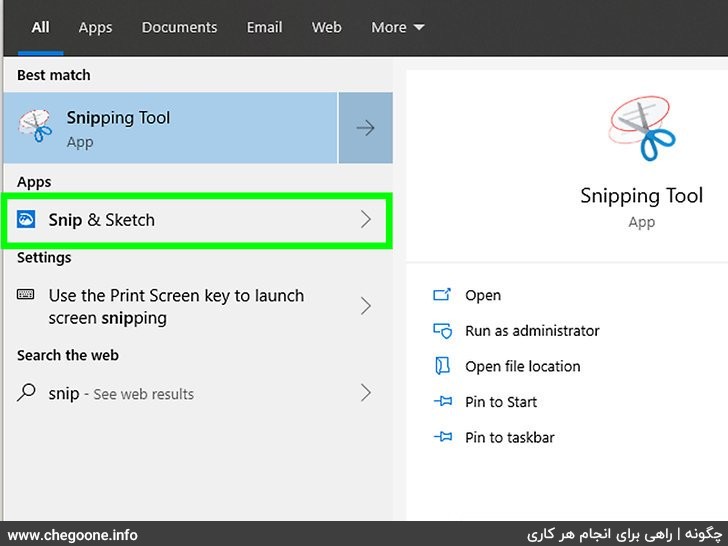
2. Open Snip & Sketch.
You can open it by entering snip in the Windows search bar and clicking Snip & Sketch in the search results.
- You can also open it by pressing ⊞ Win + ⇧ Shift + S.
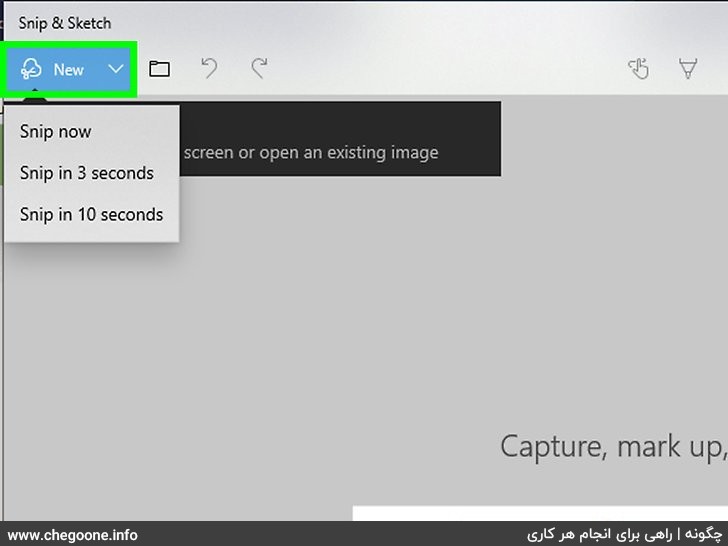
3. Click on the New option
It's the blue button near the top left corner of Snip & Sketch. Four icons will appear at the top of the screen.
- If you used a keyboard shortcut, you can skip this step.
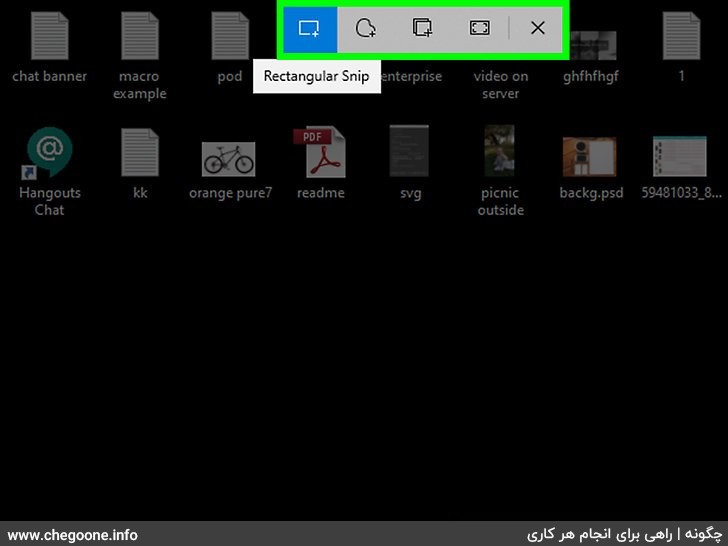
4. Select a type of image to take a screenshot.
Select a type of image to capture. Hover over each icon to see what kind of image it represents, then click on your selection to take a screenshot of the image.
- :snip rectangular: This option allows you to capture a portion of the screen by drawing a rectangle around it. After you draw your shape, a preview of the image will appear in the tool.
- Freeform Snip: This allows you to capture any part of the screen in any shape with freeform tracing. After you draw your shape, a preview of the image will appear in the tool.
- Snip Window: Use this tool if you want to capture a single window. After clicking the button, click on the desired window to take a photo and see a preview.
- Fullscreen snip: captures the entire screen and shows a preview in the tool.
5. Edit the image (optional).
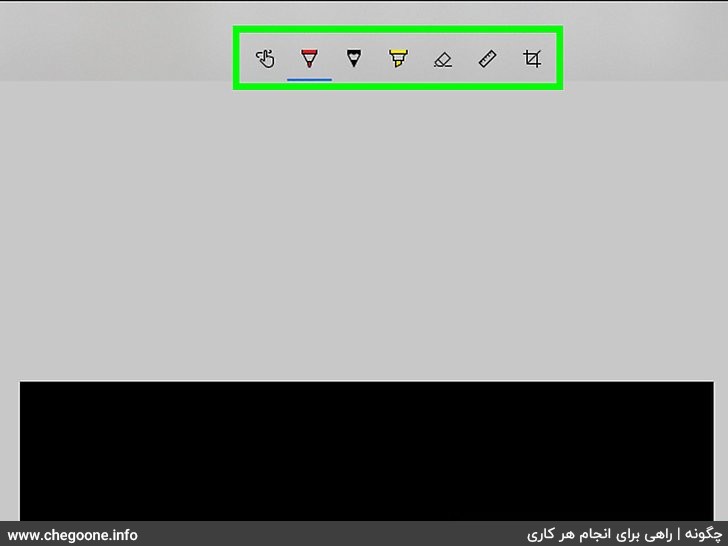
Snip & Sketch has several editing tools that you can use to change or mark up an image before saving.
- Draw the picture for free by clicking on the finger with a piece of string around it. Then you can choose a drawing and writing tool and color at the top of the page and draw the text or shape as needed.
- Click on the eraser icon to erase some of the mistakes you make while painting.
- Click the ruler icon to display the ruler at the top of the screen.
- Click on the crop icon (the square with a line through it) to keep part of the image while cropping the rest.
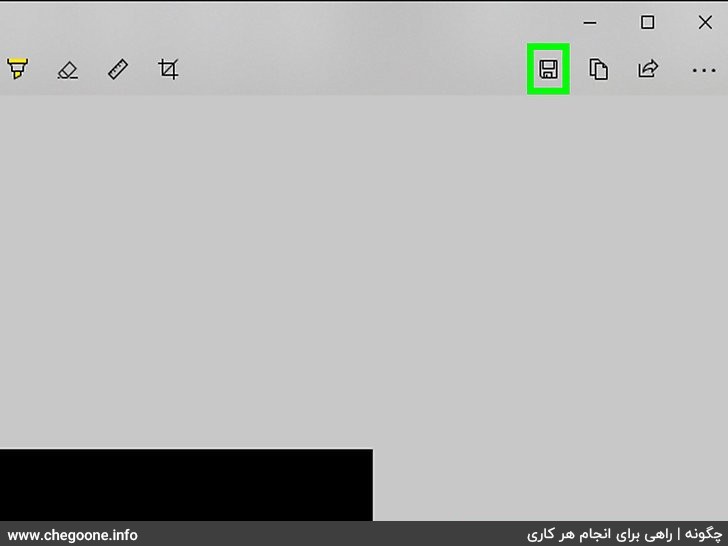
6. Click the disk icon to save your image.
Near the top right corner is Snip & Sketch.
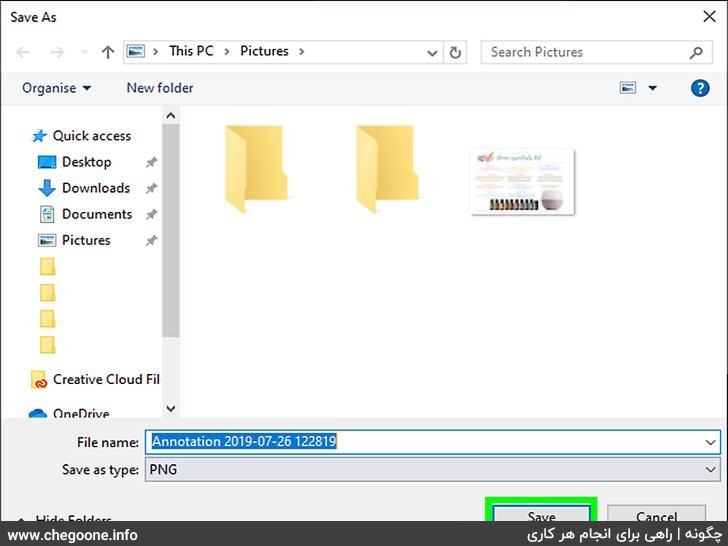
7. Select a save location and click Save.
If you want to select a specific folder and specify a file name, you can do so before clicking Save. Your image will be saved in the folder you choose.
Use the PrtSc key to capture full screen

1. Arrange your screen how you want to screenshot it.
If you want to record the whole screen, set it as desired.
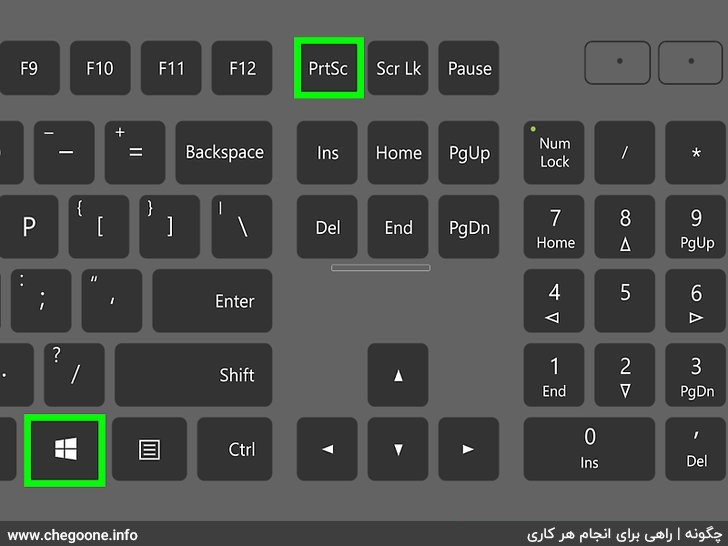
2. Press ⊞ Win + ⎙ PrtScr keys at the same time. The PrtSc key is usually on the top row of keys.
This captures the page (or window) and saves the image as a PNG image.
- The text on the key may vary by keyboard. For example, your key might say something like “PrScr” or “PrtScrn”.
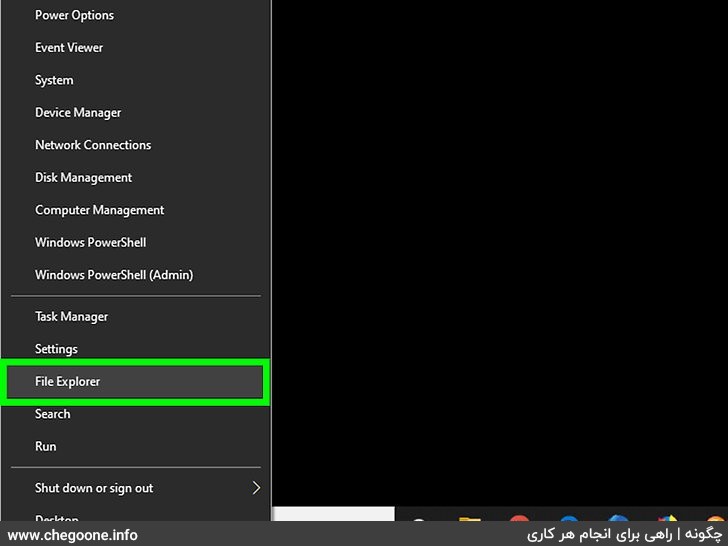
Navigate to the screenshot.3 (move to the picture)
Go to Screenshot Your screenshot will now be saved in the Screenshots folder, which is inside your Pictures folder. Here's how to get there:
- Open Press Win + E to open File Explorer.
- Click the images in the left box. If you don't see it, click the arrow next to This PC to expand more options.
- Click on the Screenshots folder on the right side.
- Double click on the last image (with the highest number in the file name) to view your image.
Use the PrtSc key to capture full screen

1. Open the window you want to capture.
If the window is already open, click its title bar at the top to make sure it's selected.
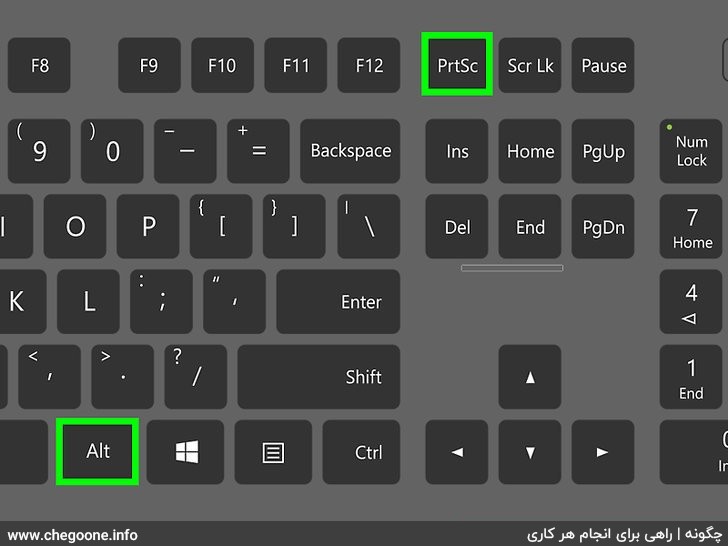
2. Press Alt + ⎙ PrtScr together.
This mode copies an image of the selected window to your clipboard.
- The text on the key may vary by keyboard. For example, your key might say something like “PrScr” or “PrtScrn”.
- Some keyboards require you to press Alt + Fn + ⎙ PrtScr together instead.
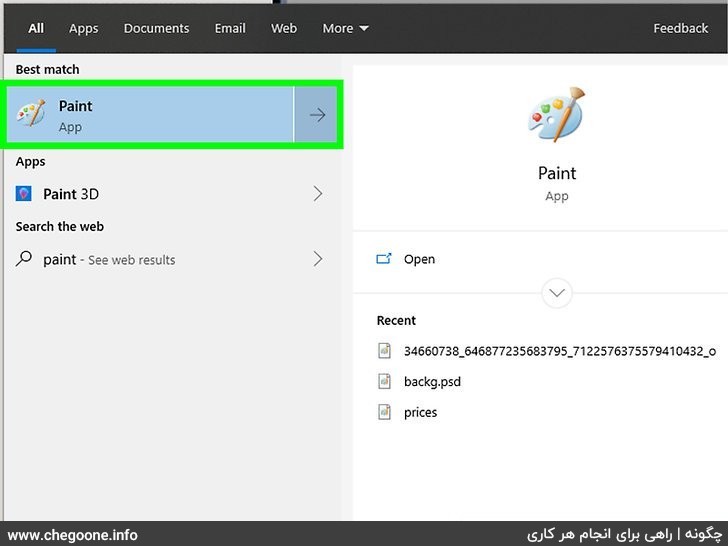
3. Open paint
You can search for it using the search bar/icon on the taskbar.
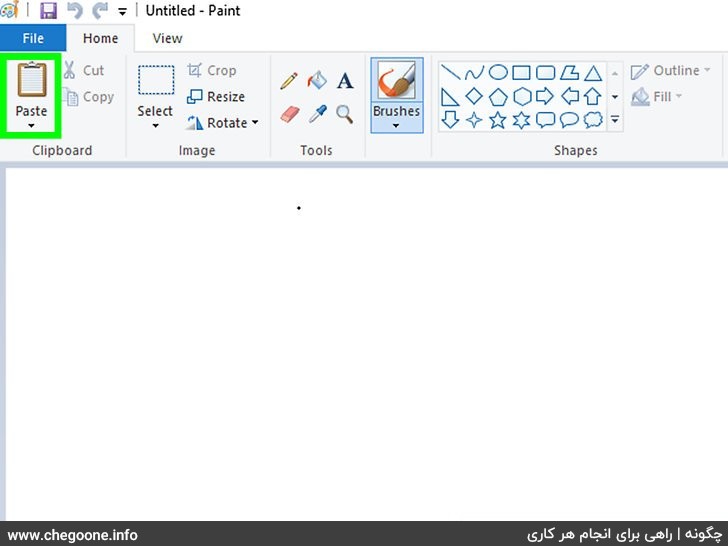
4. Press Ctrl + V to paste the image.
The image appears on the Paint canvas.
- If you want to crop anything from the image, click the Crop tool at the top of Paint and then select the part of the screen image you want to keep.
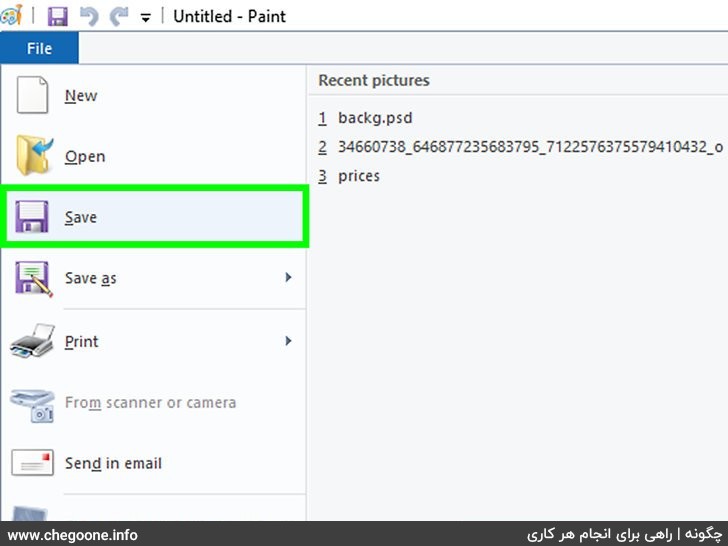
5. Click on the File menu and select the Save option.
This option selects the Save As dialog box.
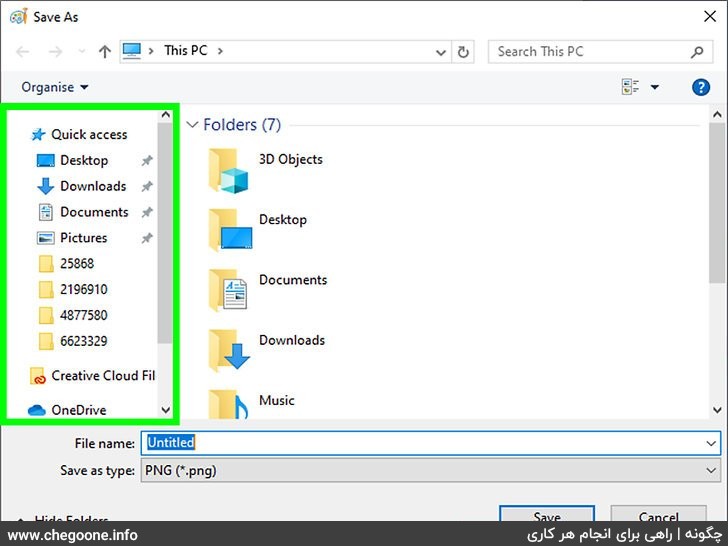
6. Select the save location.
If you want to keep your pictures organized in a folder, you can open the Pictures folder and double-click Screenshots.
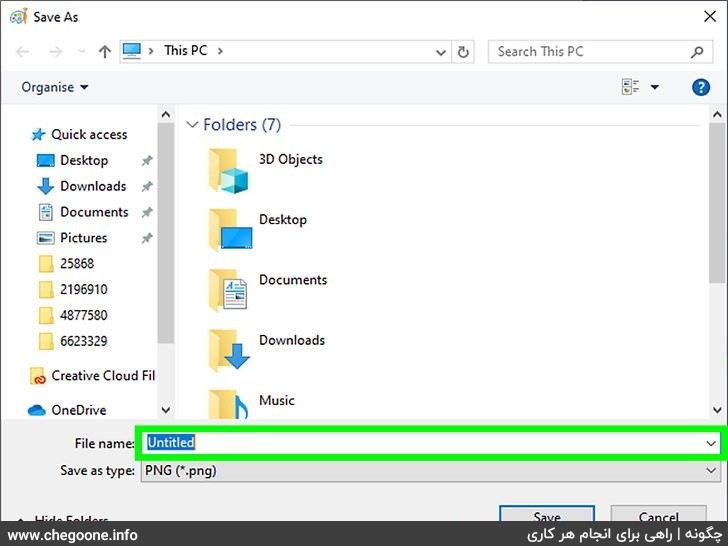
7. Enter the file name.
If you want to rename the file, type a new name in the “File name” field at the bottom of the dialog window.
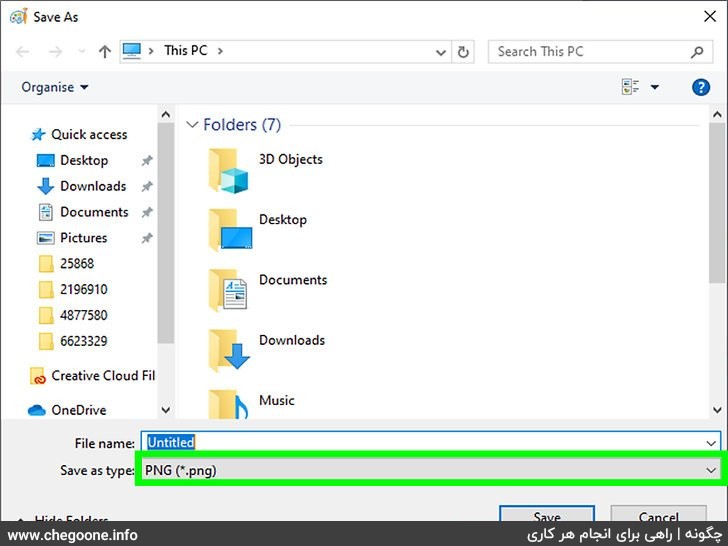
8. Select an image type from the “Save As Type” list.
It is near the bottom of the window. The default file type is PNG, but you can choose any other file type you want.
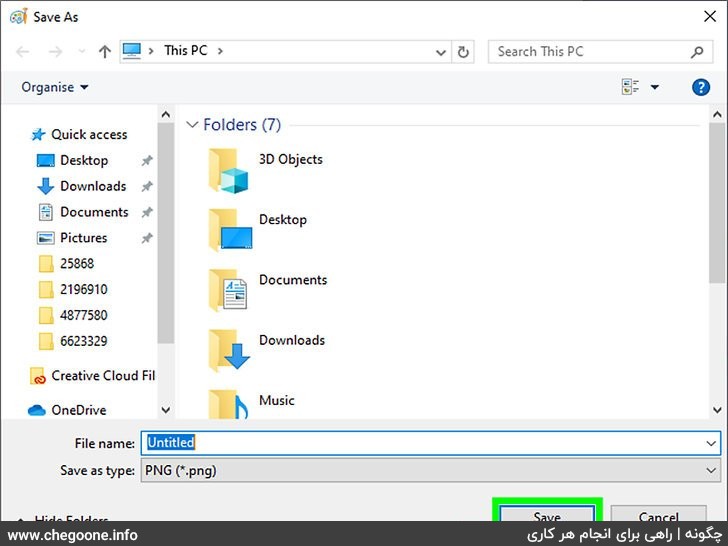
Click Save
The screen image will now be saved in the selected location.
Using the Snipping Tool
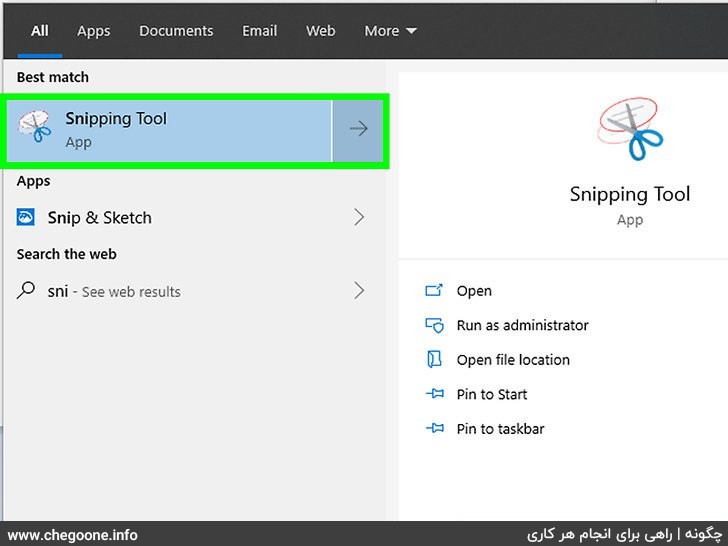
1. Open the Snipping Tool.
Snipping Tool is supposed to be discontinued in the next version of Windows 10. You can still use it as of July 2019, but it's a good idea to switch to the Snip & Sketch tool instead. To open the tool, type Sniper Tool in the search box and click on Snipping Tool.
- To get started with the new tool, see Using the Snip & Sketch method.
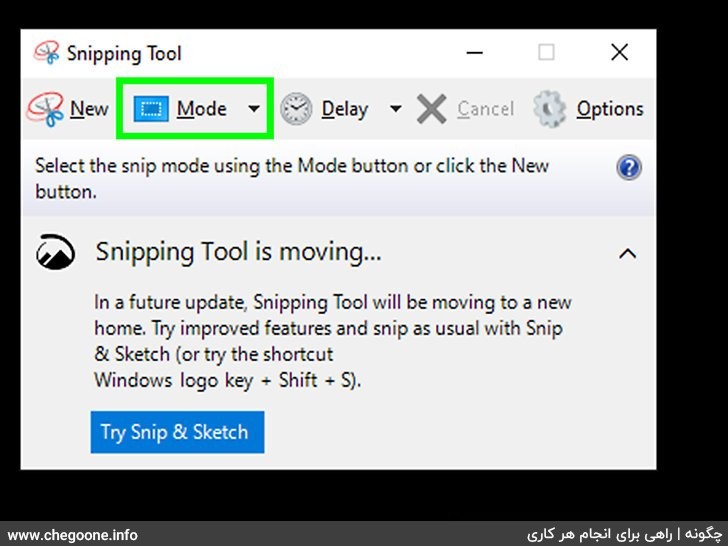
2. Click on the drop-down arrow next to the “Mode” button.
You will see four images for screen recording: “Free-form Snip”, “Rectangle Snip”, “Snip Snip” and “Full Screen Snip”.
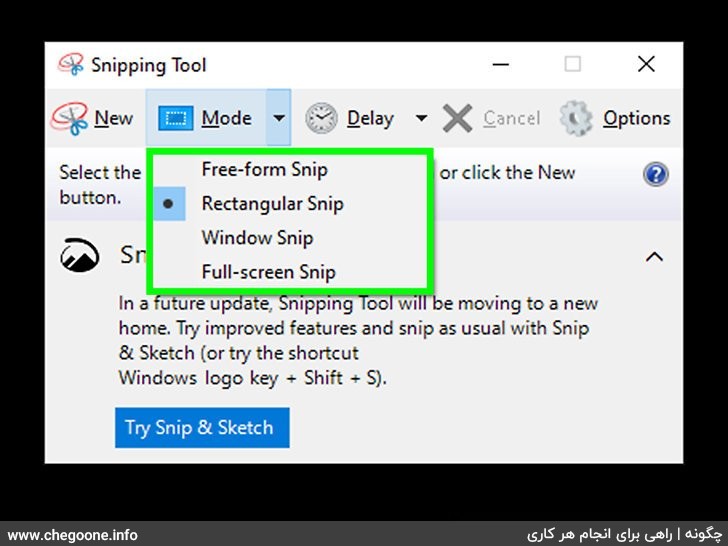
3. Click on the type of image you want to record.
Here's how everything works:
- Free-form snip: Allows you to capture a part of the screen in any shape by freely tracing.
- Rectangular snip: Allows you to capture a portion of the screen by dragging a rectangle around it.
- Window snip:If you want to capture a single window, use this tool. After clicking the button, a list of windows that you can record will be shown at the bottom of the screen. To take a photo and see a preview, click on the desired window.
- Full-screen snip:Captures the entire screen and shows a preview in the tool.
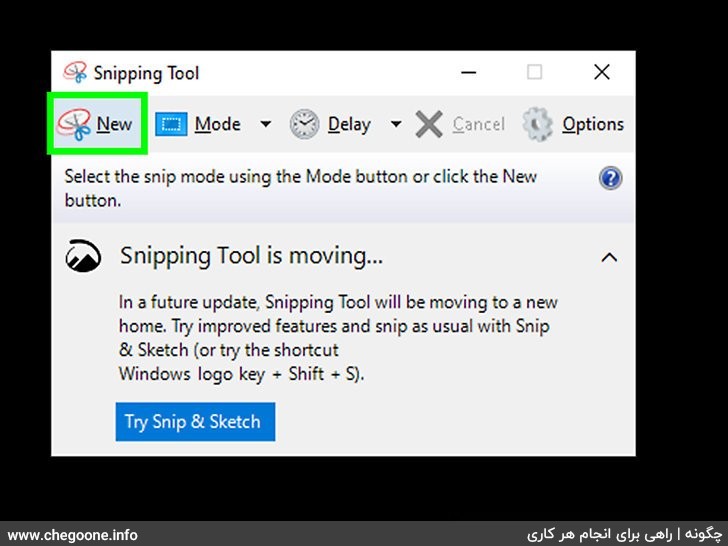
4. Click on the New button.
Near the upper left corner is the tool. Depending on the method you choose, you will experience different results:
- If you choose freeform or rectangle, the cursor will change to +. Drag the cursor to select the part of the screen you want to record. When you lift your finger from the mouse, the preview will appear.
- If you select full screen, the full screen will be recorded and a preview will appear.
- If you select a window, click on the desired window to take a photo and see a preview.
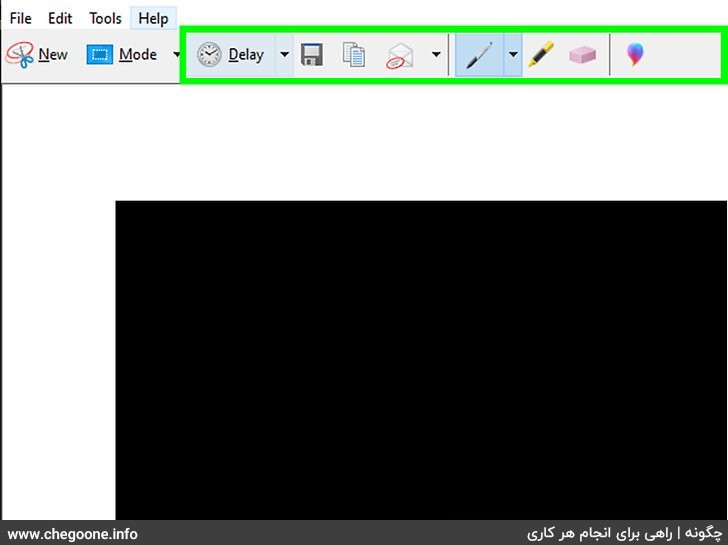
5. Edit the image (optional).
Several editing tools appear at the top of the screen:
- To choose a font color, click the down arrow next to the font icon, then drag your desired text or shape onto the screen. Use the eraser tool to erase any errors.
- To use a yellow highlight to select specific text or areas, click the highlight icon.
- For more advanced work, click the rainbow bubble icon to open the image in Paint 3D.
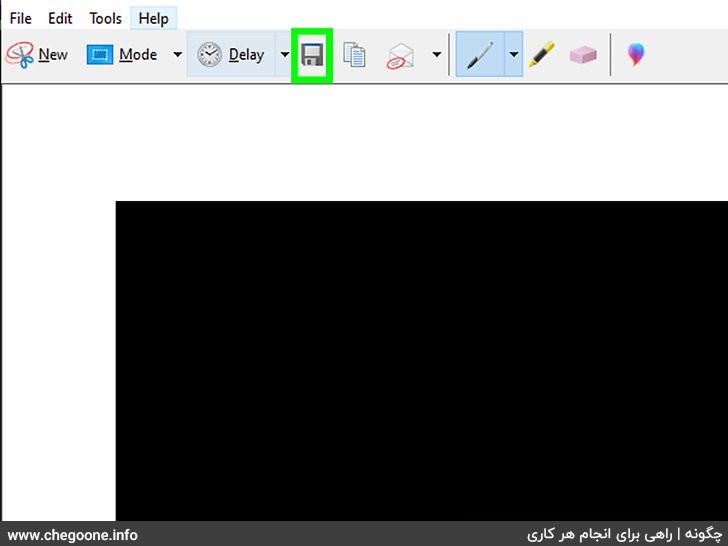
6. Click the disk icon to save your screenshot.
Click the disk icon to save your screenshot. It's on the icon bar above the Snipping Tool.
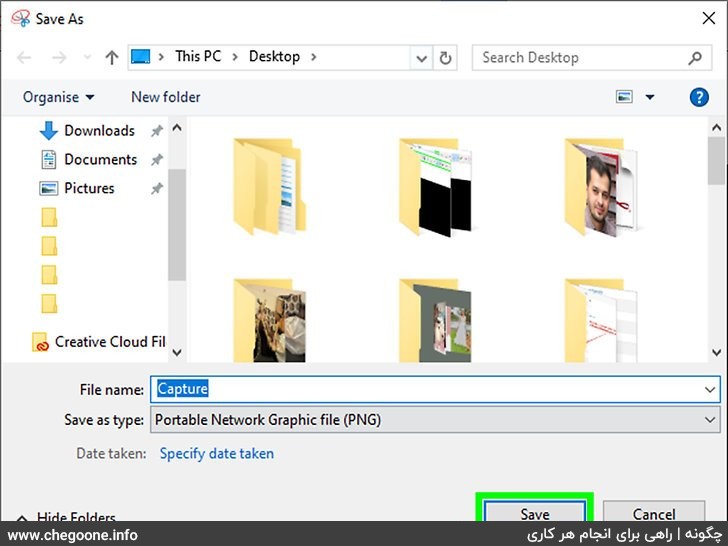
7. Select a save location and click Save.
If you want to select a specific folder and specify a file name, you can do so before clicking Save. Your image will be saved in the folder you choose.
